What is the difference between opacity masks and clipping paths?
We need two layers to create a clipping mask, one to serve as the mask and one that will be clipped to the mask, so let's add a second layer. We'll add the new layer below the image. First, unlock the Background layer. In Photoshop CC, click the lock icon to unlock it. In Photoshop CS6 or earlier, press and hold the Alt (Win) / Option (Mac) key on your keyboard and double-click on …
What are opacity masks and how do they work?
May 07, 2019 · Those 2 cloud shapes are grouped, maybe that's why is not working . From the start. Ungroup and just use one shape to create the clipping mask with the yellow. or if you need both - ungroup the clouds , select both and go. Object > Compound path > make. then use that, plus the yellow to create the clipping mask.
What is a clipping mask?
Clips and masks give different results. A clip allows you to hide all parts of the bottom object that are outside the clip object. The colors of a mask object affect the opacity of the bottom object. The darker and the more transparent the mask, the more transparent the masked object will become. A white mask works just like a clip.
How do I move and reposition content within clipping masks?
Hold down "Alt" (Win) / "Option" (Mac) and click on the layer mask's thumbnail in the Layers palette. Doing this tells Photoshop to show us the layer mask in our document, and sure enough, there it is, filled with white: The layer mask, filled with solid white, appears in …
What is the difference between a clipping mask and an opacity mask?
So what is the difference between the two methods? A clipping mask can only clip and display the underlaying objects in full. The top shape behaves like the “hole” in a picture frame. The Opacity mask however is not restricted to displaying the underlaying image fully opaque.May 23, 2003
When you make a clipping mask what happens to the layers in your file?
A layer mask uses black and white to show and hide different parts of the layer. But a clipping mask uses the content and transparency of one layer to control the visibility of another. To create a clipping mask, we need two layers. The layer on the bottom controls the visibility of the layer above it.
How do you make a clipping mask transparent?
Make Transparent Clipping Mask?
- Add a heart shape to your image.
- With the heart layer selected, choose Edit > Load Selection.
- Choose Edit > Invert Selection.
- In the Layers palette, Control-click the layer you'd like to mask and choose Add Mask.
- Choose Edit > Deselect All, then hide the original heart shape.
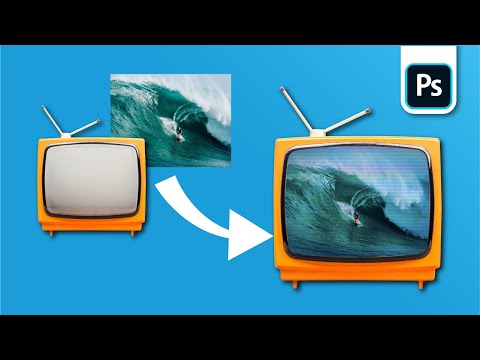
How does the Create clipping mask function work?
0:43
4:08
But what you have to do is have the um photo on top of the image you want it clip to. And then rightMoreBut what you have to do is have the um photo on top of the image you want it clip to. And then right click and create clipping mask and there you go it's done.
How many layers do you need to create a clipping mask?
So, in order to create a clipping mask, you'll need at least two layers — one layer to act as the mask, and another layer to be masked. Any layers at all will work, whether it's some text, a shape, or even a layer group.
What is the point of vanishing point tool?

Vanishing Point is a Photoshop filter that allows objects and edits in your image to be scaled and oriented according to the image's perspective. You can find Vanishing Point under the Filter menu (simply click Filter, then Vanishing Point).
How do you create a layer clipping mask?
Create a clipping mask
- Hold down Alt (Option in Mac OS), position the pointer over the line dividing two layers in the Layers panel (the pointer changes to two overlapping circles), and then click.
- In the Layers panel, select the top layer of a pair of layers you want to group, and choose Layer > Create Clipping Mask.
Jan 12, 2022
What is clipping mask Class 8?
A clipping mask is a group of layers to which a mask is applied. The bottommost layer, or base layer, defines the visible boundaries of the entire group. 8. Using the Type Mask tool in Photoshop Elements epitomizes the combination of type and image.
How do I make a clipping mask transparent in Illustrator?
0:30
9:55
Now we'll target the red oval to create a transparency mask we'll choose window. And thenMoreNow we'll target the red oval to create a transparency mask we'll choose window. And then transparency. This gives us the transparency.
How do you make a clipping mask in Canva?
Step by step: How to create a text mask in Canva
- Open a blank design in Canva.
- Search for photoholder letters.
- Drag your letters into the design.
- Add any other elements like text & images you want to use 5. ...
- Group all the elements and adjust the size.
What is a vector mask Photoshop?
A vector mask represents a path where the object clips out the contents of the layer. We can also use the Adobe Photoshop properties panel to refine the mask with the same options as the layer (pixel) mask.
How do you create type along a path?
How To Add Type On A Path In Photoshop
- Step 1: Select The Ellipse Tool. ...
- Step 2: Change The Tool Mode To "Path" ...
- Step 3: Draw Your Path. ...
- Step 4: Select The Type Tool. ...
- Step 5: Choose Your Font. ...
- Step 6: Move The Cursor Over The Path. ...
- Step 7: Click On The Path And Add Your Type. ...
- Step 8: Select The Path Selection Tool.
What is clipping mask?
A clipping mask is a group of layers to which a mask is applied. The bottommost layer, or base layer, defines the visible boundaries of the entire group. For example, suppose you have a shape in the base layer, a photograph in the layer above it, and text in the topmost layer. If the photograph and text appear only through the shape outline in ...
How to remove a layer from a clipping mask?
In the Layers panel, select a layer in the clipping mask, and choose Layer > Release Clipping Mask. This command removes the selected layer and any layers above it from the clipping mask.
How to change the stacking order of a clipping mask?
To change the stacking order of the clipping mask relative to other layers in the image, select all layers in the group. Then drag the group’s base layer up or down in the Layers panel. (Dragging a layer without selecting all ...
Can you link layers in a clipping mask?
Note: You can link the layers in a clipping mask so that they move together. The shape in the bottom layer of the clipping mask determines what area of the photo layer above shows through.
Why use opacity masks?
Opacity Masks and Clipping Paths are two of the most used tools in my workflow. They allow me to easily reveal or hide artwork without deleting any paths. As in all digital arts, it’s best to design your workflow to allow for maximum editability. It is inevitable that either myself or the client will change their mind through the process and this technique allows for easy revisions and edits, leading to less stress and happier clients.
How to see if you pasted in the opacity mask?
If you visually see the gradient on the Artboard after you paste, it means you aren’t working in the Opacity Mask area. In the Transparency panel you will notice a slight outline around either the left or right square. The left square is your Artboard artwork, the right is the Mask. It’s easy to forget if you are working on the Opacity Mask or the Artboard so make sure you are working on the correct one. When you paste into the Opacity Mask you won’t see it on the Artboard, but a preview of the shape (s) will show up in the Transparency panel, as shown below.
How to paste opacity mask in Illustrator?
Now that I have told Illustrator to apply an Opacity Mask to the Group of dots, I Paste in Front again (Paste in Front/Back are nice commands as they take the copied/cut paths and place them in the exact location where they came from) in this Opacity Mask area. Command + F is Paste in Front and Command + B is Paste in Back.
What is clipping path?
Clipping Paths are Binary (on or off) operations applied against all paths/objects within a layer. This can even include sub-layers with separately defined Clipping Paths. Opacity Masks are gray-scale Maps applied against individual paths/objects only. The only exception is that an Opacity Mask may be applied against a set ...
Can you move artwork on Opacity Mask?
If they are unlocked (by clicking on the icon) you can move the artwork independently of the Mask. This is useful if for instance you have an Opacity Mask in the shape of a shirt, but the pattern isn’t lined up correctly, you can move the pattern and the shirt stays still.
Can you move a clipping path around?
At any point you can always grab the Path and move it around if you want. Many times your Clipping Path may not be perfectly aligned so it’s nice to have the ability to nudge stuff around. Even the shape itself isn’t permanent - you can edit the individual control points! You can release the Clipping Path by selecting the Clipping Path and clicking on the same icon that created it in the Layers panel, or to completely remove it you can drag the path into the Trashcan in the Layers panel.
Can an opacity mask be applied to a group of objects?
The only exception is that an Opacity Mask may be applied against a set of objects if they are Grouped. It may be easier to understand with this simple example: To the left is the original art with no opacity or clipping applied.
What is clipping mask?
With a clipping mask, any areas on the top layer that are sitting directly above transparent areas on the bottom layer are hidden. Since the bottom layer contains nothing but transparency, no part of the image above it is visible: With no content on the mask layer, the image on the clipped layer is hidden.
What is a clipping mask in Photoshop?
What Are Clipping Masks? Clipping masks in Photoshop are a powerful way to control the visibility of a layer. In that sense, clipping masks are similar to layer masks. But while the end result may look the same, clipping masks and layer masks are very different.
How to unlock the background layer in Photoshop?
In Photoshop CS6 or earlier, press and hold the Alt (Win) / Option (Mac) key on your keyboard and double-click on the Background layer: Unlocking the Background layer . This unlocks the Background layer and renames it "Layer 0":
How many layers do you need to make a clipping mask?
But a clipping mask uses the content and transparency of one layer to control the visibility of another. To create a clipping mask, we need two layers. The layer on the bottom controls the visibility of the layer above it.
What does it mean when a layer is blank in Photoshop?
With the top layer turned off, we see the layer we just added. By default, new layers in Photoshop are blank, meaning they have no content at all. A layer with no content is transparent and we see right through it. When there are no other layers below a transparent layer, Photoshop displays the transparency as a checkerboard pattern, as we see here:
What layer is the photo on?
If we look in the Layers panel, we see the photo on the Background layer, which is currently the only layer in the document:
Can you move a clipping mask?
Of course, the result might look better if our subject was centered inside the shape. With clipping masks, it's easy to move and reposition content within them. Just select the Move Tool from the Toolbar:
How does a clip affect the opacity of a mask?
Clips and masks give different results. A clip allows you to hide all parts of the bottom object that are outside the clip object. The colors of a mask object affect the opacity of the bottom object.
What does a white mask do?
The darker and the more transparent the mask, the more transparent the masked object will become. A white mask works just like a clip. The path for clipping (and masking) has been positioned above the head of the griffin. On the left, the griffin’s head was clipped with the circle. On the right, the circle was used as a mask.
What is the circle on the griffin's head?
On the left, the griffin’s head was clipped with the circle. On the right, the circle was used as a mask.
How to know if a layer mask has been added?
This is your layer mask thumbnail, and it's how we know that a layer mask has been added to the layer: After adding a layer mask to a layer, a layer mask thumbnail appears to the right of the layer's preview thumbnail. Notice that the layer mask thumbnail is filled with solid white.
Who said nothing worth doing in life should be done without layer masks?
A wise man once said, "Nothing worth doing in life should be done without layer masks". Apparently, the wise man was a big Photoshop user who may have spent a little too much time alone on top of the mountain. But enough about him.
How to hide everything on a layer in Photoshop?
The "getting paid by the hour" way to accomplish this would be to go up to the Layer menu at the top of the screen, choose Layer Mask, and then choose Hide All (remember last time, we chose "Reveal All"). The faster and easier way though is to hold down your Alt (Win) / Option (Mac) key and click on the Layer Mask icon at the bottom of the Layers palette:
What does it mean to apply a mask in Photoshop?
"Applying" the mask basically means telling Photoshop to erase all the pixels on the layer that were hidden from view by the layer mask, as if you had erased them yourself with the Eraser Tool.
Why do I have a white layer in Photoshop?
The reason layer masks are filled with white by default is because usually, you want to see everything on your layer when you first add the mask, and white in a layer mask means 100% visible. What if instead, you wanted to hide everything on the layer when you add the mask, so that as soon as the mask is added, everything on that layer disappears from view? Well, we just learned that black on a layer mask means 100% transparent, so we would need a way to tell Photoshop that instead of filling the new layer mask with white, we want it to be filled what black. You'll most likely come across situations where it makes more sense to hide everything on the layer when you add the mask rather than leaving everything visible, and fortunately, Photoshop gives us a couple of easy ways to do that. First of all, I'm going to delete my layer mask by simply clicking on its thumbnail and dragging it down onto the trash bin icon at the bottom of the Layers palette:
Why is the layer mask filled with white?
The reason why the thumbnail is filled with white is because the mask itself is currently filled with white, even though the mask is currently hidden from view. If you want proof that the mask really is there in your document and really is filled with white, simply hold down Alt (Win) / Option (Mac) and click directly on the layer mask thumbnail in the Layers palette:
Why do we need to know about layer masks?
Layer masks are right up there at the top of the list of things you really need to know about when working in Photoshop because without them, your work, your creativity and your flexibility all suffer. It's that simple. It's a good thing for us, then, that layer masks are so incredibly simple and easy to understand!
Why do we use anchor points in masks?
One of the benefits of creating our own shapes is that we can use the anchor points to edit the mask. By using the Direct Selection tool, we can move around the anchor points.
Who is Zap Layden?
Zap Layden is a Designer and Game Developer. They are currently working as a freelance media designer and designing games at Super Retro Duck. When they aren't working, you can find them making pixel art and playing video games or just reading about birds.
Is InDesign a clipping mask?
In InDesign, most objects we use are within frames. Interestingly, these can be considered clipping masks in and of themselves. As the frame and the content within can be moved separately, InDesign comes with this basic form of masking built in.
Can you make a clipping mask in InDesign?
Curious if you can you make clipping masks in InDesign? Masking is an essential skill to learn in many different design applications, and InDesign, of course, is no different. There are a few different ways in which we can make masks with InDesign, but one of the most convenient ways is by using custom frame shapes. We'll be looking at a number of different ways to create clipping mask InDesign effects in this tutorial.
Can you clip masks with different shapes?
And there you have a quick way of creating a clipping mask with a different shape. Of course, you can use this same method with all the frame shape tools, including the Rectangle and Polygon Frame Tool.
Can you use the shape tool to make a mask?
However, tracing over typography with the Pen Tool would be really time-consuming. Luckily, there is a handy tool for turning typefaces into a layer mask.
Can you copy an image on a stage?
You can also copy the image if you would like! Cutting is a good idea, though, so that we don't have multiple copies of the same image on our stage.
Why use opacity masks in Photoshop?
Opacity masks permit more complex clipping paths because they don’t gradients. Instead, black hides content while white reveals it. This works the same way Layer Masks do in Photoshop, just with vector shapes. One use of opacity masks is fading a photo over a complex background, when a gradient from opaque to transparent covers too many details. Use a similar effect to create the sense of a reflective surface as well by repeating the content as a fading “shadow.” Also consider opacity masks to create a vignette effect in Illustrator without the use of Photoshop.
Why do clipping paths apply evenly across the clipping path?
Additionally, the clipping mask applies evenly across the clipping path, because they ultimately ignore colors and gradients. Blending modes like Screen can mimic a gradient clipping mask, and blending mode settings like Knockout can prevent the blend mode from interfering with other styles. However, the layers and blend modes involved might complicate making clipping paths.
How to make a mask in Illustrator?
First, select the object you wish to clip. Then, in the Menu bar, click the text for Opacity to reveal a small panel. The panel displays two thumbnails: the active object on the left and on the right an empty gray thumbnail.
Can you use opacity masks in Illustrator?
The strategic combination of clipping paths and opacity masks allows for more complex layering in your Illustrator documents. If the document requires a lot of raster graphics and even more complex masks, then try importing the vector objects from Illustrator into Photoshop as Smart Objects and work with Layer Masks in Photoshop.
Popular Posts:
- 1. where can i find a lawyer in eureka, california traffic violation citation
- 2. who was the lawyer and address defending the irene garza 60 year case
- 3. which film is about a burned-out lawyer trying one last case to keep from going under?
- 4. when your lawyer doesn t respond
- 5. who is the smartest lawyer in the world
- 6. the lawyer behind memo how trump
- 7. how do yu find out if a lawyer has been disbared
- 8. how do i get to interview on gta 4 to lawyer office
- 9. how much does a lawyer recieve on sexual harrasement cases
- 10. book character who is a lawyer and a rich playboy