How do I add an address button to a Word document?
Feb 17, 2013 · Answer. Doug Robbins - MVP Office Apps & Services (Word) MVP. Replied on February 17, 2013. Add the Address Book (from the All Commands group) to the Quick Access Toolbar. Hope this helps, Doug Robbins - MVP Office Apps & Services (Word) dougrobbinsmvp@gmail.com.
How do I add an address book to a toolbar?
Microsoft Word for Lawyers. Microsoft Word is possibly the most used tool in a lawyer’s toolbox. From drafting depositions to collaborating with teams outside your firm, it’s an amazing tool chock-full of features to help you run your business. It’d be great if Microsoft Word for Lawyers existed. Unfortunately, the tool was created to be ...
How to insert a barcode in word?
1. Open Microsoft Word. 2. On the FILE menu, click NEW. 3. Click the LEGAL PLEADINGS tab. 3. Double click PLEADING WIZARD. This will begin the “Pleading Wizard” program, which takes you step-by-step through creating your own.
How do I add an address layout to my address book?
In Microsoft Word 2010, follow the below steps to create a custom property for current Word document -. Step 1: Open the new or an existing Word document. Step 2: Click on the File tab at the top left corner of the document. Step 3: A list of file options will appear on the screen with the selected Info tab. Step 4: Click on the drop-down menu ...
How do you insert a legal line in Word?
Add line numbers to a section or to multiple sectionsClick in a section or select multiple sections.On the Page Layout tab, in the Page Setup group, click Line Numbers.Click Line Numbering Options, and then click the Layout tab.In the Apply to list, click Selected sections.Click Line Numbers.More items...
How do I insert address bar in Word?
Here's how to add it to a toolbar:In Word, choose View | Toolbars | Customize, then switch to the Commands tab..Under Categories, choose Insert.Near the bottom of the Commands list, you'll find Address Book. Drag that command to any toolbar currently displayed in Word.
How do I add an Address Book to my quick access toolbar?
Adding an Address Book Button to the Quick Access Toolbar Click “Quick Access Toolbar” from the sidebar on the left and then choose “Commands Not in the Ribbon” from the “Choose Commands From” drop-down menu. Choose “Address Book” and then click the “Add” button to add it to the Quick Access Toolbar.Nov 28, 2020
How do you create an Address Book in Microsoft?
Create address bookSelect the People tab at the bottom of your Outlook screen.On the Home tab, under My Contacts, right-click the Contacts folder, and then click New Folder.In the Create New Folder dialog box, name the folder, select where to place it, and then click OK.More items...
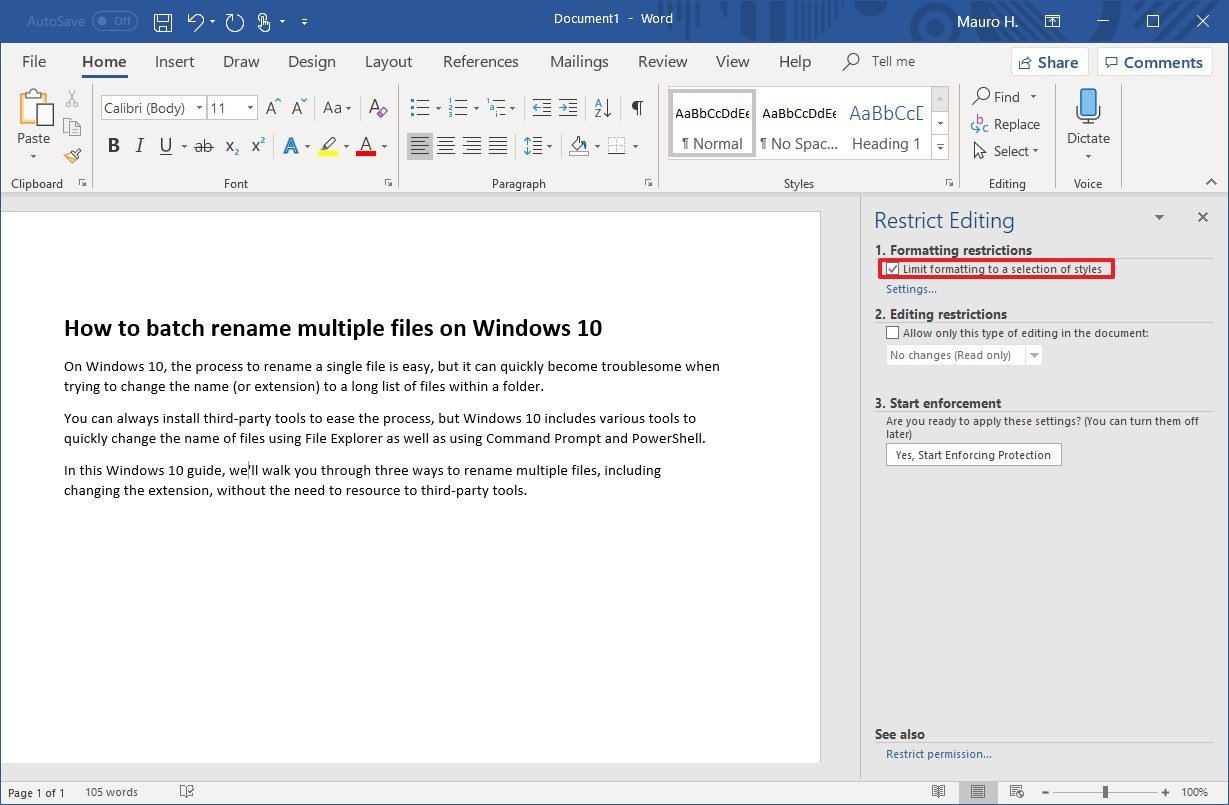
How to apply a style to a text?
To apply an existing Style (such as one of the above) to your text, select the text with your mouse. Once your text is selected, click on the Style name in the Quick Styles Gallery on the Home tab. Your text will be re-formatted in the new Style.
What is the most used tool in a lawyer's toolbox?
Microsoft Word is possibly the most used tool in a lawyer’s toolbox. From drafting depositions to collaborating with teams outside your firm, it’s an amazing tool chock-full of features to help you run your business.
What is a blackline in Word?
Word includes a legal blackline tool which makes it easy to compare two documents and visualize what changed between them. The blackline tool creates a new document to make it easy to see differences between documents and save those updates as needed. This is especially helpful when you need to compare two versions of a contract or other document.
What is a style in Word?
Thank goodness for Word’s Styles feature. Styles are a simple way to apply pre-set formatting definitions to blocks of text. For example, you can easily designate a style called “Heading 1” which formats all of your first-level headings in a particular font, single-spaced, and centered.
How to see how a particular style reformats?
To see a preview of how a particular Style will reformat your text, simply hover your mouse pointer over that Style and pause a moment— your text will briefly change to the new settings. It will revert to its previous formatting as soon as you move your mouse pointer away.
What is the first setting in Word?
The first setting, under Display on the left, instructs Word to always update any field values before printing a document . The second, under Advanced, will always display fields on the screen with shading so you can always see, at a glance, which items are just text and which are fields.
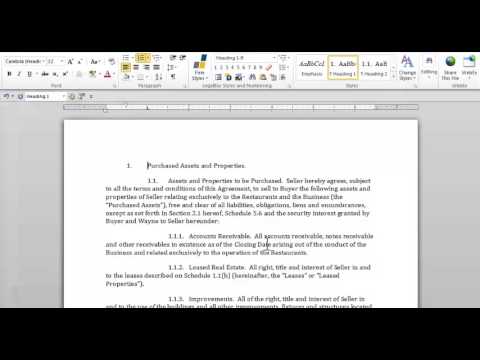
What is auto numbering in Word?
Word’s auto-numbering tool is powerful and useful for attorneys. For example, it’s a great way to number affirmative defenses in your legal documents. You’ll find the auto-numbering tool in the toolbar with options to choose different numbering styles based on your needs.
Can you use Office Tab in Word?
Office Tab lets you set up tabs in Word just like you can in Excel (you can also use it for Excel, which already has tabs . . . so, not sure why you would need it, and PowerPoint, which doesn’t and really needs it). Set up all your Word docs as tabs - with the power to control each from the tab.
Can you share a legal template with Woodpecker?
Woodpecker also makes it easier than ever to standardize your documents and share them with your team. With just a few clicks, you can share a modernized, custom-branded legal template with anyone on your team. That puts everyone, literally, on the same page.
Can you use Woodpecker on Word?
And with Woodpecker, you can continue to utilize the Word documents that you already use, no need to switch to a new platform or document format. Sign up for a Woodpecker account and try Woodpecker Pro today.
How to create a custom property in Word 2010?
Step 1: Open the new or an existing Word document. Step 2: Click on the File tab at the top left corner of the document. Step 3: A list of file options will appear on the screen with the selected Info tab. Step 4: Click on the drop-down menu ...
How to set advanced properties in Word?
Follow the below-mentioned steps to set advanced document properties in Word document -. Step 1: Open the new or an existing Word document where you want to set advanced document properties. Step 2: Go to the File tab on the Ribbon. A list of File options will appear with the selected Info option. Step 3: Click on the drop-down menu associated ...
How to see advanced document properties?
Follow the below instruction to see the advanced document properties -. 1. Open the Word document where you set the advanced document properties. 2. Go the File tab on the Ribbon, a list of options will appear on the screen with the selected Info tab. 3.
What are the properties of a document?
Document properties are also referred to as metadata. They include information related documents such as title, author name , subject, and keywords to identify the document's topic. In Microsoft Word, there are the following four types of document properties -. Standard properties.
Changing The Address Layout
- Word includes a default AddressLayout entry that you can't see or edit directly. Test it by using the Insert Address button to insert an address from your Address Book. To add, remove or rearrange fields, create a new layout in a Word document, then save it as a new AutoText entry named Add…
Non-English Word
- If you are using a non-English version of Word, AddressLayout may not be the correct name for the AutoText entry that you need to modify. If you discover what the correct name is for a particular language, please let us know and we'll add it to this list: 1. Dutch -- AdresIndeling 2. French -- MiseEnPageAdresse 3. German -- Adreßlayout or Adresslayout 4. Italian -- IndirizzoLay…
Notes
- If you want to write a Word macro to insert addresses, use the GetAddress method. This also gives you the option of specifying an address layout, rather than using the AddressLayout entry from AutoText. There's a good example in the VBA help file in Word.
Additional Notes on The Fields
- In an Outlook contact, if you edit the Subject field, subsequent changes to any name field will cause the Subject field also to change. If you are using the Reorder Contacts form to change the way...
- For Outlook Contacts, the <PR_EMAIL_ADDRESS> and <PR_ADDRTYPE> fields work with the E-mail field only. There are no corresponding fields for the E-mail 2 and E-mail 3addresses.
- In Outlook, the Country field is often filled in by default with a value determined by your regional settings (Control Panel | Regional Settings). Click Address on the Contacts record to check the...
Popular Posts:
- 1. where can i find an eviction lawyer financial
- 2. japan how to become a lawyer
- 3. how to consult an immigration lawyer
- 4. how to file a lawsuit without a lawyer in california
- 5. what is a lawyer called after passing the bar
- 6. what does lawyer up mean
- 7. lawyer who works on contingency in chandler
- 8. what are qualifications for a court appointed lawyer
- 9. how does a lawyer send a due process complaint for doe
- 10. review savvy estate planning: what you need to know before you talk to the right lawyer